To put WooCommerce Drag & Drop Uploader to action, you need to create a product.
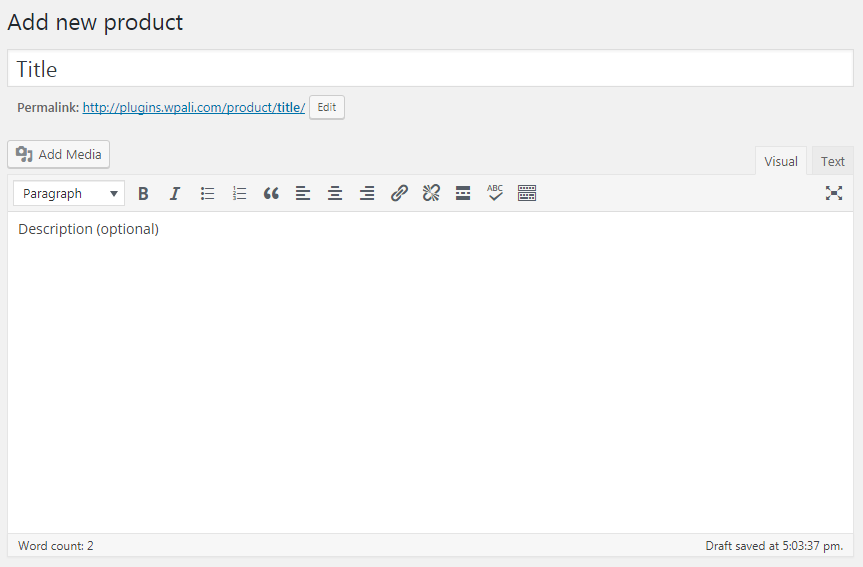
1. Go to: Products > Add Product. A familiar WooCommerce interface for product creation appears.
2. Enter a title and description for your product.
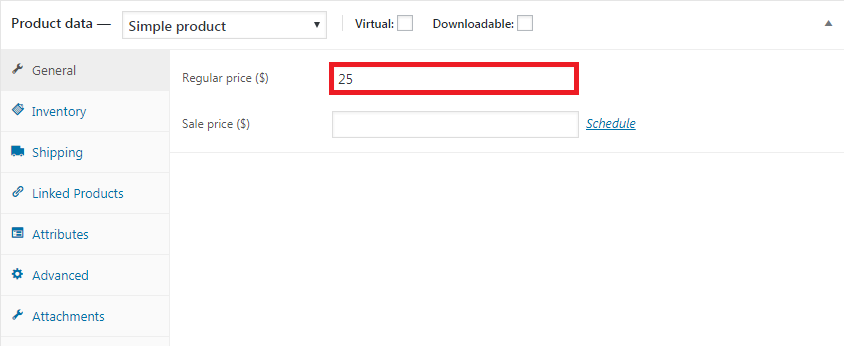
3. You should have “Simple Product” selected by default from Product Data dropdown menu, now enter product price.
Note: the plugin works also with variable products
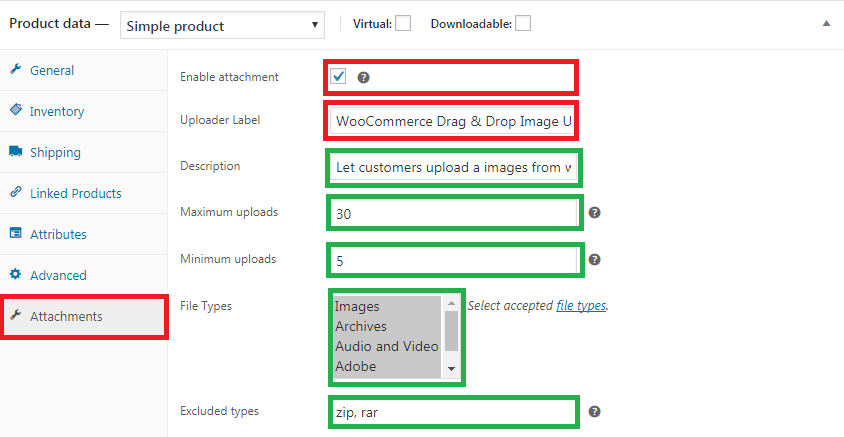
4.Click “Attachments” tab, check Enable attachment and give the image uploader a label.
Maximum uploads: Use this field to define the maximum number of files the customer can upload to the product.
Minimum uploads: Use this field to define the minimum number of files that customer need to upload before being able to add the product to his cart.
File Types: This field allow you to choose the type of files you want to accept, you can select multiple options by using the keyboard key CTRL.
Excluded types: You can use this field to specify the file type that are not accepted. You can find all available type from the file types list
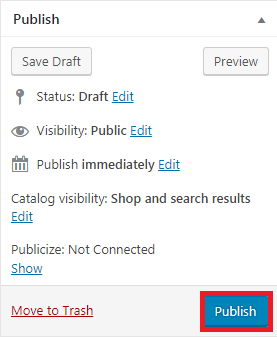
6. After you finish these steps, click publish.
The result should be the similar to this:

That’s it, wasn’t hard, was it?